Showing posts with label Cinema 4D. Show all posts

Monday, 9 May 2016

Cinema 4D Bottle Designs - Expanded


Following the workshop on designing and prototyping bottle labels I decided to come up with another design. I just wanted to experiment a little more with 3D, especially materials, so I took this opportunity to look at different bottle textures as well as applying a new design.

Wednesday, 20 April 2016

Helvetica Beer


In this tutorial I learnt how to use Cinema 4D as a prototyping tool. I began by importing the outline of the side of the can in preparation to use the lathe tool.I then started to create the material for the can, I set up the reflection first by using the legacy mode and applying a fresnel and other material properties. I then imported the map image onto the material and changed its projection settings to cylindrical, and then set the tag to fit to the can shape. I then added the fill and key light and placed them in the right place to create a soft shadow. I also added a room light to brighten the scene. In the render settings I also tweaked the Anti Aliasing to soften the diagonal lines. At this point I was noticing some streaking where the subdivisions were and no one could figure out what was causing the problem other than a possible fault with the graphics card, so I rendered out what I had and planned to move to another machine later.


The next project was to do something similar but with a bottle shape. So I brought int he line file and added a lathe to the bottle and the liquid layer. I set up the background and added a material. I then imported a preset glass texture and removed the roughness. I also tweaked some of the reflective parameters just to get the material just right. I also duplicated this material and changed the colour to act as my liquid, I applied this to the liquid lathe. To begin placing the elliptical label I first created a cylinder the same radius as the bottle. I created a material alpha channel and imported a beer label .png. Creating the cap would be a little complicated, to create this I used a series of stars and circle splines, I then included them into a loft and moved the circles up to create a crude cap shape. I then added a material like I did with the bottle. I then imported the cap and placed it onto the bottle.


Wednesday, 9 March 2016

Cinema 4D, Type Design and Colour Exploration... All in One


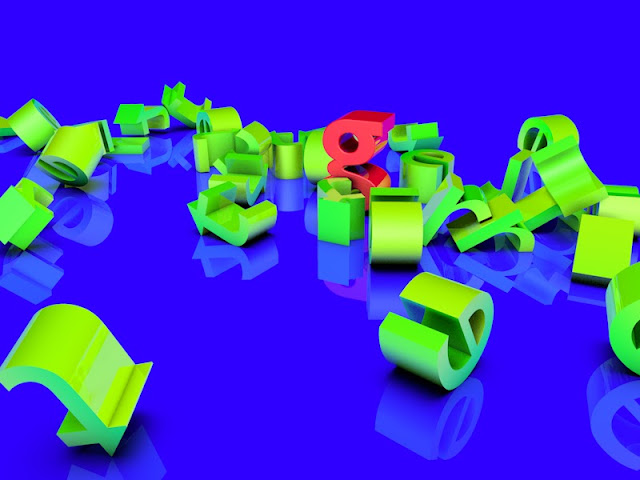
In todays Process and Production lesson we were using Cinema 4D to create 2D graphics. During the session we created a letter and experimented with reflective materials and realistic shadows etc. This is when I realised this was an amazing way to display typography and would fit perfectly with my Letter Sketching project I have going, so I took a letter I created a while back, along with one of the colours I was creating yesterday...and created this amazing and vibrant 3D image! This is the first time I have pulled my personal work, Production work and my contextual portfolio all together and really had fun with it. I will likely use this 3D template for future and re-visited letters.

Cinema 4D Lesson Two


So I started by creating the project folder and drawing a rectangle in Cinema 4D. I extruded the rectangle to 5000cm, I also added some subdivisions and changed the viewport so the segments were visible. I removed the caps of either end of the rectangle to make it into a tube. Considering the hierarchy of objects in Cinema 4D, I added a twist object into the extrude object and played with he parameters. So now I had a long twisted tube I could look down. I created a luminent checkerboard texture and applied it to the tube, when I look down the tube now it looks like a hypnotic tunnel. The lines of the texture looked a little odd and bent, so I had to go back into the rectangle object and change the Intermediate points setting to subdivided. I used similar tools to then create a sphere. I also added a reflection to my sphere making sure I include the Fresnel texture. I then changed the render settings, including some tweaks to Anti Aliasing, then rendered the final image. I did a second render where I added the Ambient Occlusion effect which adds tiny shadows to corners and crevices. This gives the scene a greater 3D and lifelike presence.


The next step is to add a particle system which will add dynamic movement and randomness to my image. I added the particle emitter object and changed its position. I fiddled with some of the parameters of the emitter and also added the sphere so the emitter spits out random spheres which rotates and travels in any direction. I then added some collision physics to the tube and the square. Now unfortunately gravity is having an effect on the sphere so they just fall to the floor, so I just turned gravity off.

Then it was time to try something new, so I created a new file and added a floor and background with a compositing tag. I then added a letter with the MoText tool. I added some fillet caps for smooth edges and adjusted the font and size. I created some ruminant and reflective gradient materials. I added and experimented with colours, reflections and gradients until I came to a nice looking combo between the background and the letter. I then drew a phrase and added a cloning object. I will be dropping the letters from this sentence onto the one letter I created earlier. I added some dynamics to the object like in the first exercise.


I then decided to also render this sequence as a QuickTime film.

Saturday, 20 February 2016


This tutorial was the first time I have used cinema 4D, however I have used other 3D software like 3Ds Max and SketchUp. I quickly set up a project document and familiarise myself with all the tool which are similar to the other 3D software I have used. I created some quick Illustrator artwork and made sure to save it as an Illustrator 8 format, this makes it compatible to export into Cinema 4D. When creating my artwork I also have to make sure I was importing closed shapes, otherwise when I convert them into 3D object it will only effect the stroke.

I used the extrude tool to pull the shape along the z axis and make it a 3D object, I also added some very subtle curved edges to make it softer and pleasing on the eye. The next step was to set up an environment in which to place and capture my 3D object, imagine it like setting up a photography studio. I created a floor and background and make them the same colour to give the endless slope effect. To add the colour I needed to create a material which I can then apply to the shapes, so I created each colour I would be using and applied it.


I then created a camera and two lights and set them up in a way that created soft and shallow shadows. I set the camera up to be looking down at an angle, this is a typical product photography frame. To add the camera object I set my perspective viewport up to where I wanted the camera, then created the object, the camera object is placed in exactly my position of perspective. To finish I added some atmospheric lighting effects and exported the frame as a JPEG.